

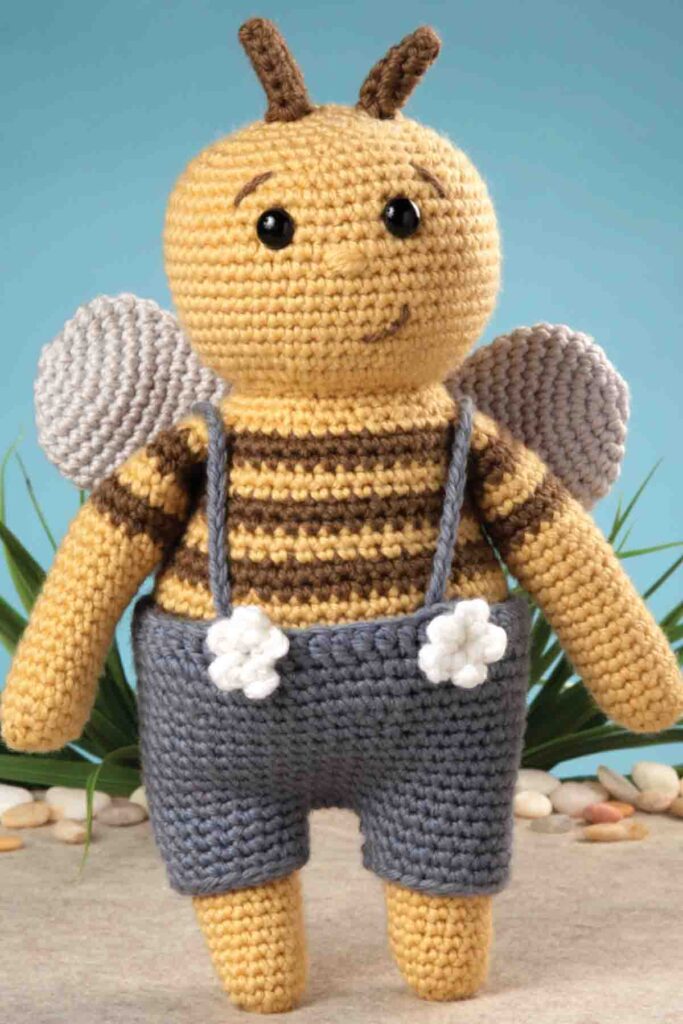
Buster takes stripes and suspenders to a new level.
He’s so cheery and wants to spread lots of crochet love!
This easy-level pattern guides you through creating a delightful 9-inch (23 cm) tall bee complete with striped arms, legs, and body, plus adorable suspenders and flowers.
With clear instructions and helpful tips, you’ll have your own Buster buzzing with personality in no time.
Skill Level and Measurements
Skill Level: Easy
Measurements: About 9″ (23 cm) tall
Materials
Yarn
Aran weight (#4 medium)
Shown here: Cascade Yarns 220 Superwash Aran (100% superwash Merino; 150 yds [137.5 m]/3.5 oz [100 g]):
- 818 Daffodil (A)
- 871 White (B)
- 875 Feather Grey (C)
- 818 Mocha (D)
- 248 Flint Stone (E)
- 291 Dark Ivy (F)
- 1 ball each
Hook
Size US C (2.75 mm)
Adjust hook size as necessary to obtain the correct gauge.
Notions
- Yarn needle
- Two 10-mm safety eyes
- Polyester fiberfill
- Stitch markers
Gauge
24 sc and 24 rows = 4″ (10 cm)
Notes
When working within the pattern, use the invisible single crochet two together (sc2tog) instead of the regular single crochet two together to create a less visible decrease. Refer to a tutorial if needed for this technique.
Buster the Bee Pattern
Arms (Make 2)
Rnd 1 (RS): With A, create a magic ring, 6 sc in ring; do not join – 6 sc. Place marker to indicate beginning of round. Note: Loop a short piece of yarn around any stitch to mark Rnd 1 as the right side (RS). Stuff lightly with polyester fiberfill as you make the arm, leaving the top ½” (1.5 cm) unstuffed. Move the stitch marker up with each round.
Rnd 2: 2 sc in each sc around – 12 sc.
Rnd 3: (Sc in next 3 sc, 2 sc in next sc) around – 15 sc.
Rnds 4-16: Sc in each sc around. Cut A and weave in the end as you work along. Join D. Note: Change colors in the last stitch of each round. Do not cut yarn unless otherwise specified.
Rnds 17-18: Sc in each sc around – 15 sc. Fasten off.
Rnds 19-20: Join A, sc in each sc around.
Rnds 21-22: Join D, sc in each sc around. Fasten off.
Rnd 23: Join A, (sc in next 3 sts, sc2tog) around – 12 sc.
Rnd 24: Sc in each sc around; join with sl st to first sc. Fasten off.
Foot & Leg 1
Rnd 1 (RS): With A, create a magic ring, 6 sc in ring; do not join – 6 sc. Place marker to indicate beginning of round. Note: Loop a short piece of yarn around any stitch to mark Rnd 1 as RS. Stuff firmly with polyester fiberfill as you make the leg.
Rnd 2: 2 sc in each sc around – 12 sc.
Rnd 3: (Sc in next 3 sc, 2 sc in next sc) around – 15 sc.
Rnds 4-10: Sc in each sc around.
Rnd 11: (Sc in next 4 sc, 2 sc in next sc) around – 18 sc.
Rnds 12-14: Sc in each sc around. Begin stuffing with polyester fiberfill.
Rnd 15: (Sc in next 5 sc, 2 sc in next sc) around – 21 sc. Fasten off.
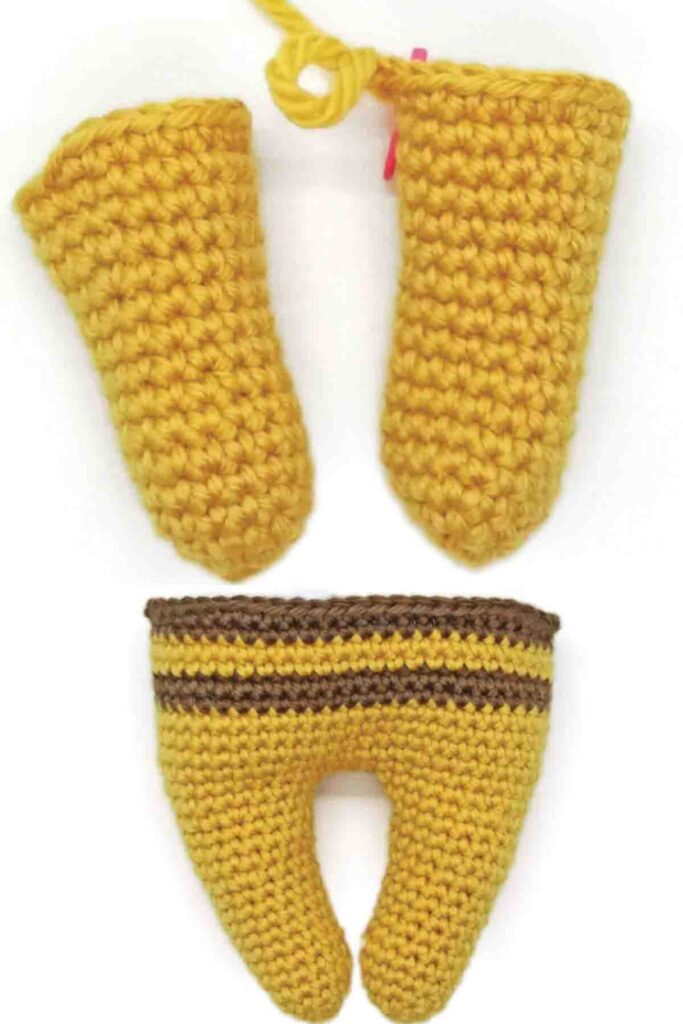
Foot & Leg 2
Repeat Rnds 1-15 of Foot & Leg 1. Mark the 17th stitch with a marker. Do not fasten off (see Fig. 1). Continue to Body.
Body
Rnd 1: Beginning with Leg 2, sc in next sc, ch 3, join with sc in any st on Leg 1, sc in next 20 sc, sc in next 3 chs, sc in next 20 sts on Leg 2; join with sl st to first sc – 45 sc. Note: When working in the 3 chs, mark the 2nd sc as the back middle. Move the marker up as the body pattern progresses to remain in the back middle.
Rnd 2: Sc in next sc, sc in unworked side of next 3 chs, sc in each st around – 48 sc.
Rnd 3: (Sc in next 7 sts, 2 sc in next st) around – 54 sc.
Rnds 4-6: Sc in each st around. Fasten off A.
Rnd 7: Join D in marked st in back middle, ch 1, sc in each st around; join with sl st to first sc.
Rnd 8: Ch 1, sc in each st around; join with sl st to first sc. Fasten off.
Rnd 9: Join A in marked st in back middle, ch 1, sc in each st around; join with sl st to first sc.
Rnd 10: Ch 1, sc in each st around; join with sl st to first sc. Fasten off.
Rnds 11-12: Repeat Rnds 7 and 8. Begin stuffing with polyester fiberfill.
Rnd 13: Join A in marked st in back middle, ch 1, (sc in next 16 sts, sc2tog) three times; join with sl st to first sc – 51 sc.
Rnd 14: Ch 1, sc in each st around; join with sl st to first sc. Fasten off.
Rnd 15: Join D in marked st in back middle, ch 1, (sc in next 15 sts, sc2tog) three times; join with sl st to first sc – 48 sc.
Rnd 16: Ch 1, sc in each st around; join with sl st to first sc. Fasten off (see Fig. 2).
Rnd 17: Join A in back marked st in back middle, ch 1, (sc in next 4 sts, sc2tog); join with sl st to first sc – 40 sc.
Rnd 18: Ch 1, sc in each st around; join with sl st to first sc. Fasten off A.
Rnd 19: Join B in back marked st in back middle, ch 1, sc in each st around; join with sl st to first sc.
Rnd 20: Ch 1, sc in each st around; join with sl st to first sc. Fasten off B.
Rnd 21: Join A in back marked st in back middle, ch 1, sc in each st around; join with sl st to first sc.
Rnd 22: Ch 1, sc in each st around; join with sl st to first sc. Fasten off A.
Rnds 23-24: Repeat Rnds 19-20. Note: In Rnd 25, crochet the arms in place with the same stitches for the round. Fold the arm opening in half and work through both arm stitches and body stitches with the same stitches for Rnd 25 to crochet the arm in place.
Rnd 25: Join A in marked back st in back middle, ch 1, sc 7, sc in next 6 sts working in arms at the same time, sc in next 14 sts, sc in next 6 sts working in arms at the same time, sc in next 7 sts.
Rnd 26: (Sc in next 3 sts, sc2tog) around – 32 sc.
Rnd 27: Sc in each sc around.
Rnd 28: (Sc in next 3 sts, sc2tog) around – 24 sc. Do not fasten off. Stuff the body with polyester fiberfill.
Head (Continued from Body)
Rnd 1: 2 sc in each st around – 48 sc.
Rnd 2: (Sc in next 7 sts, 2 sc in next st) around – 54 sc.
Rnds 3-13: Sc in each st around.
Rnd 14: (Sc in next 7 sts, sc2tog) around – 48 sc.
Rnd 15: (Sc in next 6 sts, sc2tog) around – 42 sc.
Rnd 16: (Sc in next 5 sts, sc2tog) around – 36 sc.
Rnd 17: (Sc in next 4 sts, sc2tog) around – 30 sc.
Rnd 18: (Sc in next 3 sts, sc2tog) around – 24 sc.
Rnd 19: (Sc in next 2 sts, sc2tog) around – 18 sc. Attach safety eyes between Rnds 12-13, about 7 sts apart. Stuff the head with polyester fiberfill.
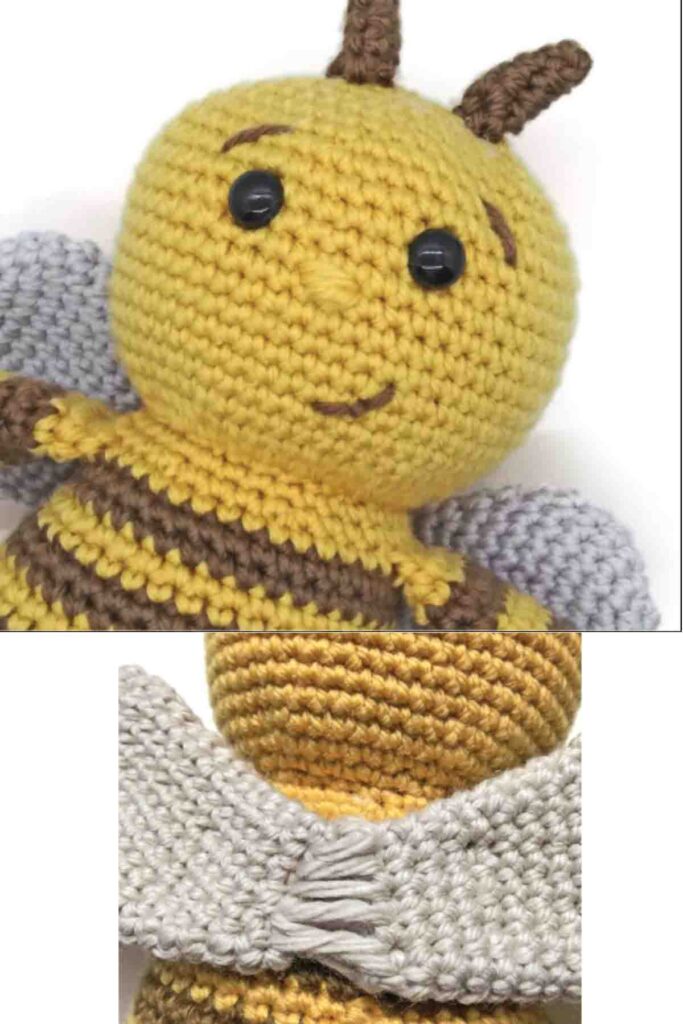
Rnd 20: (Sc in next st, sc2tog) around, sl st in next sc – 12 sc. Fasten off, leaving a long end for sewing. Thread the yarn needle with the long end and weave the needle through the stitches on Rnd 20; pull tightly to close the hole and secure the end. With D, stitch on eyebrows and mouth. With A, stitch on the nose (see Fig. 3).
Antennas (Make 2)
With D, ch 6.
Row 1 (RS): Sc in 2nd ch from hook and in each ch across – 5 sc.
Rows 2-4: Ch 1, turn, sc in each st across. Fasten off, leaving a long end for sewing. Thread the yarn needle with the long end and sew the long ends into a cylinder shape to sew the antenna to the top of the head.
Wings (Make 2)
Rnd 1 (RS): With C, create a magic ring, 6 sc in ring; do not join – 6 sc. Place marker to indicate beginning of round. Note: Loop a short piece of yarn around any stitch to mark Rnd 1 as RS. Move the stitch marker up with each round.
Rnd 2: 2 sc in each sc around – 12 sc.
Rnd 3: (Sc in next st, 2 sc in next st) around – 18 sc.
Rnd 4: (Sc in next st, 2 sc in next st) around – 27 sc.
Rnds 5-6: Sc in each st around.
Rnd 7: Sc2tog, sc in next 25 sc – 26 sc.
Rnd 8: (Sc2tog, sc in next 11 sts) around – 24 sc.
Rnd 9: (Sc2tog, sc in next 10 sts) around – 22 sc.
Rnd 10: (Sc2tog, sc in next 9 sts) around – 20 sc.
Rnd 11: (Sc2tog, sc in next 8 sts) around – 18 sc.
Rnd 12: Sc in each st around.
Rnd 13: (Sc2tog, sc in next 7 sts) around – 16 sc.
Rnd 14: Sc in each st around.
Rnd 15: (Sc2tog, sc in next 6 sts) around – 14 sc.
Rnd 16: Sc in each st around.
Rnd 17: (Sc2tog, sc in next 5 sts) around – 12 sc.
Rnd 18: Sc in each st around; join with sl st to first sc. Fasten off, leaving a long end for sewing. Join the wings by stitching the ends together (see Fig. 4), then attach the connected wings to the back of the body.
Pants
With E, ch 54, join to first ch with sl st, being careful not to twist the chain.
Rnd 1 (RS): Ch 2 (not a st), dc in each st; join with sl st to first dc – 54 dc.
Rnd 2: Ch 1, sc in each st around; do not join. Place marker to indicate beginning of round.
Rnds 3-4: Sc in each st around.
Rnd 5: (Sc in next 7 sts, sc2tog) around – 48 sc.
Rnd 6: (Sc2tog, sc in next 22 sts) around – 46 sc.
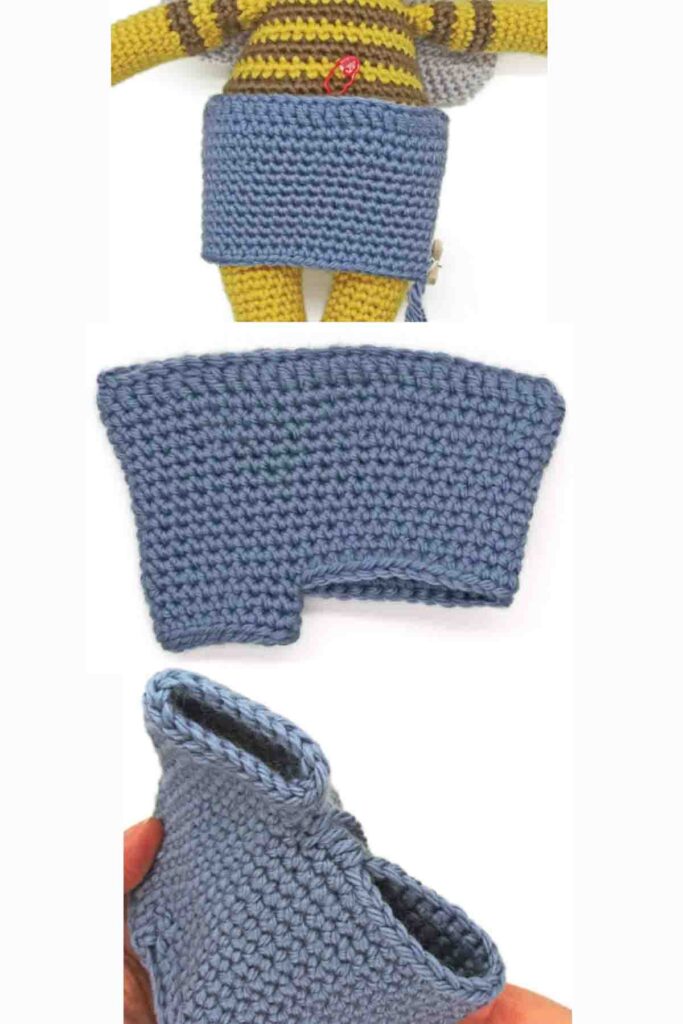
Rnds 7-13: Sc in each st around (see Fig. 5).
Pant Leg 1
Rnd 1 (RS): Working directly into Pant Leg 1; sc in next 20 sts, leave remaining sts unworked.
Rnd 2: Sc in first sc of Rnd 1, sc in each st around – 20 sc.
Rnd 3: Sc in each st around; join with sl st to first sc.
Rnd 4: Ch 1, working in the back loops only (blo), sl st in each st around. Fasten off (see Fig. 6).
Pant Leg 2
Rnd 1 (RS): Join E in the 4th unworked st from Pant Leg 1, ch 1, sc in next 20 sts, leaving the last 3 sts unworked – there are 3 unworked sts before joining and 3 unworked sts at the end of Pant Leg 2.
Rnds 2-4: Repeat Rnds 2-4 of Pant Leg 1. Fasten off, leaving a long end for sewing. Thread the yarn needle with the long end and sew to the front and back of the pants, one over each shoulder.
Suspenders (Make 2)
With E, ch 28. Fasten off, leaving a long end for sewing. Sew one end to the front of the pants and the other to the back, crossing them if desired for a suspender look.
Front Flowers (Make 3)
With B, ch 4, sl st to first ch.
Rnd 1 (RS): (Ch 4, sl st to center ch) five times. Fasten off. Thread the yarn needle with F and sew on the front of the pants in front of each suspender.
Back Flower
With F, ch 6, sl st to first ch.
Rnd 1 (RS): (Ch 4, sl st to center ch) six times. Fasten off. Sew the 3rd front flower onto the center of the back flower. Thread the yarn needle with F and sew in the center of the wings.
Finishing
Weave in all ends.
Thread the yarn needle with E and sew the middle stitches of the pants together (see Fig. 7).
Sew the pants to the body.
Attach the antennas to the top of the head.
Sew the wings to the back of the body. Attach the flowers as instructed.


